Showing posts with label Hypertufa. Show all posts

Saturday, July 19, 2014

A hypertufa planter for mini hostas


I've been making hypertufa planters for a few years now but mostly smaller stuff. I really wanted one to combine a collection of mini hostas in one container.
Whenever I make hypertufa planters, I let them cure over winter in a dry place before planting in them so this is the one I made last year. You don't necessarily have to cure them that long, a few month's is usually good enough. Maybe longer for larger pieces like this one. It's just by the time I get around to making them its too late to plant in them so I let them cure all winter.
 
There are a lot of recipes out there but mine is pretty straight forward. Equal amounts of Peat Moss, Portland Cement, and Perlite. A little more or less of one or the other is not going to matter.
For more details of the mixing and what it should look like go here.
 
 
For this container I'm using a large sturdy cardboard box. First fill the bottom for a depth of about 1 3/4 to 2 inches. I do a little less for smaller pieces but I figured a larger piece might benefit from a thicker base.
 
I start building up the sides. Now the best way to do this is to insert a smaller box and fill in the sides, but I didn't have a box the right size and I have had luck just forming it with my hands.
 
I work my way around the box, slowly working my way up. It takes a lot of time and patience doing it this way. Add more water if your mixture gets too dry.


 Try to keep it as even as possible but it doesn't matter if a few places are a little thicker than others.
 
 
Now cover it with plastic and let it dry for a few days before removing the cardboard.  Make sure its completely dried before lifting it because they are still very fragile at this point.
 Drill a few drainage holes in the bottom before planting in it or you could insert some wooden dowels in the bottom while your tufa is still wet.
 
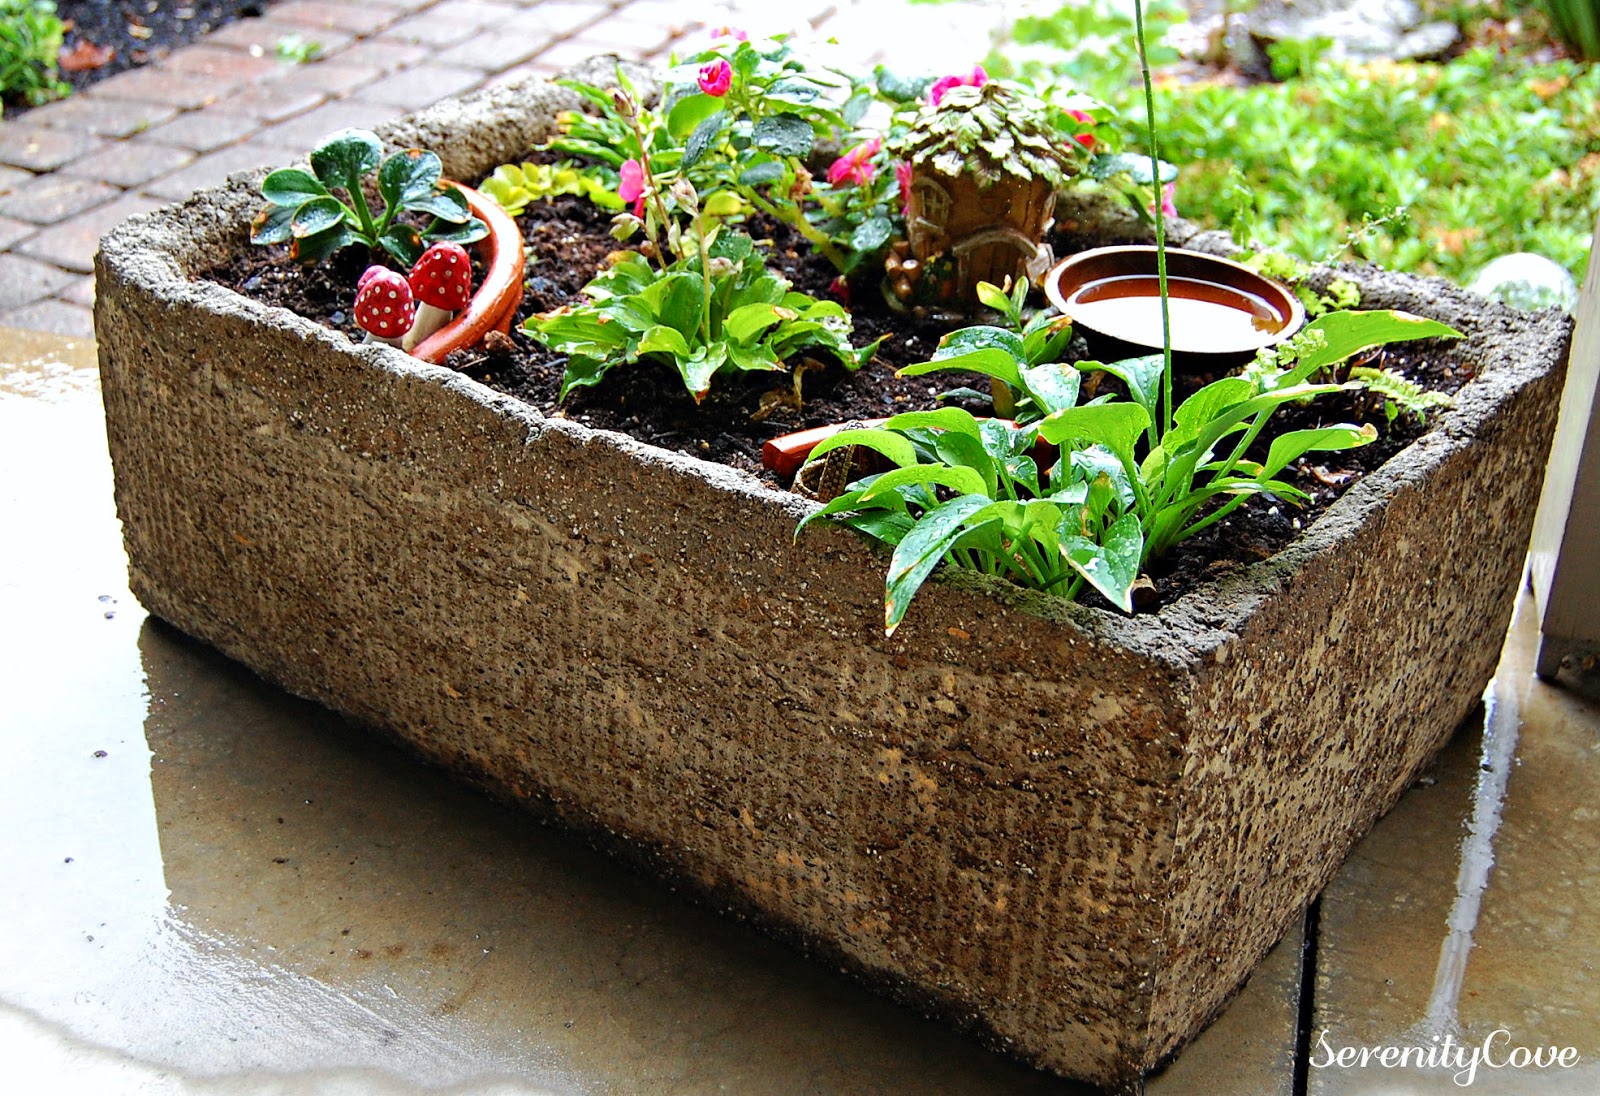
 Then the real fun begins. I put in Stiletto on the left, Blue Mouse Ears on the right, above Blue Mouse Ears is Cracker Crumbs, on the top right is an unknown petite hosta. The rest is just fillers for now.  My plans are to gradually make this a Mouse Ears collection and remove the other hostas. There are many varieties and I would like to add a new one every year.
 

Tuesday, August 13, 2013

Hypertufa Planters

 After seeing hypertufa planters in magazines and on-line, I decided to make my own. Here are the ones we made so far. I say we because I enlist my husband to help with this task. He mixes and I mold. For information on what hypertufa is and how to make it go here.
My favorite way to display these planters is using them as fairy gardens.

This is the first one we made just by using a cardboard box and inserting a smaller one on the inside. Well....in my rush to see the final product I broke off the entire back but we managed to fix it well enough to use. Lesson learned......Be patient!

A bowl I made last year. I pressed a fern frond into the wet mixture for this look.

 You can buy some of the cutest things to put in fairy gardens. I'm afraid this is going to be addicting!

I did a tutorial doing this basket last year here. 
I planted hosta 'Stiletto', Creeping Jenny, Coleus, and Torenia in this one. 

Succulents are perfect in these planters too.

Here is a 'Praying Hands' hosta in a planter.  I got too much cement in this one and it is a lot heavier than the newer ones. You can tell it's not as porous looking as some of the others. I also used to put some sand in them but last year I tried it without. I prefer the ones with just equal amounts of cement, peat moss, and perlite. They are a lot lighter.


And when I run out of ideas or plants I fill them with Impatiens.
 

Friday, July 20, 2012

Hypertufa Bowl


Last week I made a hypertufa planter using an old fruit basket as my mold. In this post I'll show another way to make them. For more information and instructions on making the mix see that post.
I'm not a good judge when it comes to the amounts of cement, peat moss etc. needed for each planter so I just make sure I have plenty and use the leftovers to create a smaller container or a leaf cast.
This time I way over guessed what I needed and still had a lot left.
 I quickly grabbed an enamel pan and piece of plastic and made a bowl.

You have the option of making it on the inside for a smaller bowl, but I had so much mix leftover I opted to make a larger bowl and made it on the outside.

I put my plastic over the bowl.....

and start covering my bowl with the mix.


Press and pat and check the thickness with a marked dowel keeping the thickness around 1 inch to 1 1/2 inches. Make sure you keep the top as flat and level as possible because that will be the bottom of your bowl.


I experimented pressing some Fern Fronds into the completed bowl for a textured look.
Cover with plastic and let it dry 36-48 hours.

After it's dried the recommended time, remove the bowl and plastic very carefully. They are very fragile at this point. I broke the first one I ever made because I was so anxious to see it, I removed it from the mold too soon.

I love the look the Fern Fronds add to the bowl.

Overall, I was pretty pleased with how it turned out. Now I will let this cure until next spring. It's good to mist them occasionally.

This is another option to use up your leftover mix. Make a leaf casting using a large leaf such as an elephant ear, rhubarb or hosta leaf. I love when rain water collects in them but hypertufa is porous so it doesn't hold water long. I spray painted this one which helps hold the water, but a sealer of some sort would probably work better.
Linking to Stonegable

Wednesday, July 11, 2012

Making a Hypertufa Planter

What in the world is hypertufa? That is the question usually asked when I mention making hypertufa planters.
Hypertufa is a man made substitute for tufa which is a porous limestone rock suitable for plant growth. Hypertufa is a mixture of Portland cement, peat moss, perlite or vermiculite and water and is used to create planters, stepping stones or leaf castings. Planters made with this mixture are a lot lighter in weight than concrete but look similar.
You can use many different containers to mold your planters. So far I have used mostly sturdy cardboard boxes, enamel or plastic containers lined with plastic. Make sure there are no ridges in it. You won't be able to get your container out. Trust me....Been there. Done that!
 Foam ice chests or baskets can also be used. You will sacrifice your basket, so use an old one that you don't want anymore.

First of all you will want to wear latex gloves for this project and a mask if you desire.
There are many recipes out there but most are similar. I use a very basic recipe of 1 part Portland cement, 1 part perlite and 1 part peat moss. I sift out the larger pieces of the peat moss. Make sure you use Portland cement and not concrete. There is a difference. You can also use 1 part sand in it for a stronger container but that will add weight.
So far I always made them with the sand added, but decided to experiment this time without. I can tell there is a difference in the weight of the container without the sand. So if they hold up as well as the others, I will omit the sand from here on.
Put your ingredients in a large tub or wheelbarrow and mix together with a garden hoe. If your project is smaller, you can mix with your hands. Make sure it is mixed very well.
TIP 1: If your cement has hard lumps, discard it and buy a new bag.
TIP 2: You can add coloring to your mix if you desire. I haven't tried that yet, but I am going to sometime.

Start adding water slowly and mix with the hoe. Keep adding water and mix well making sure all your ingredients are getting mixed in. Keep checking for pockets of unmixed material on the bottom and in the corners.


Take a handful of the mixture. It should hold it's shape when you form it into a ball. A little bit of water might ooze from when you squeeze it, but you don't want too much. If it's too wet add some more dry ingredients.
I try to keep it a little on the dry side and add a bit of water as I need it.
When you are satisfied with your mix start forming your container.

For this container I'm using an old fruit basket I was ready to toss.
Begin by filling in the bottom of the basket. Pat and press keeping the thickness about 1 1/2 inch thick. I use a wood skewer marked at 1-1/2 inch and check to make sure everything is even.
 If you want to put drainage holes in you can make some by poking some dowels through your mixture. My husband drills a few holes in them for me because for some reason I never remember to do this when I'm making them.

The bottom completed now it's time to start the sides.

Gradually build the sides by adding a handful at a time. Pat and press going all the way around keeping it as uniform as possible.
If your mix seems to be getting dry, add a little bit of water.

Keep building......
And building.....

Almost done!

Done!!! Now it needs to cure. Cover it with plastic and let it dry for 36-48 hours.

Now I start removing the basket. It's very fragile at this point so work very carefully.  See what I meant about sacrificing the basket!

The container now needs to cure for a month or two.  Mist it occasionally with the hose to keep it moist or let it sit in the rain to leech out the lime. Since it's usually mid-summer by the time I get around to making them, I just put them on my porch and let them cure until next spring. 
We had enough mix left to make a bowl which I will show in a separate post.